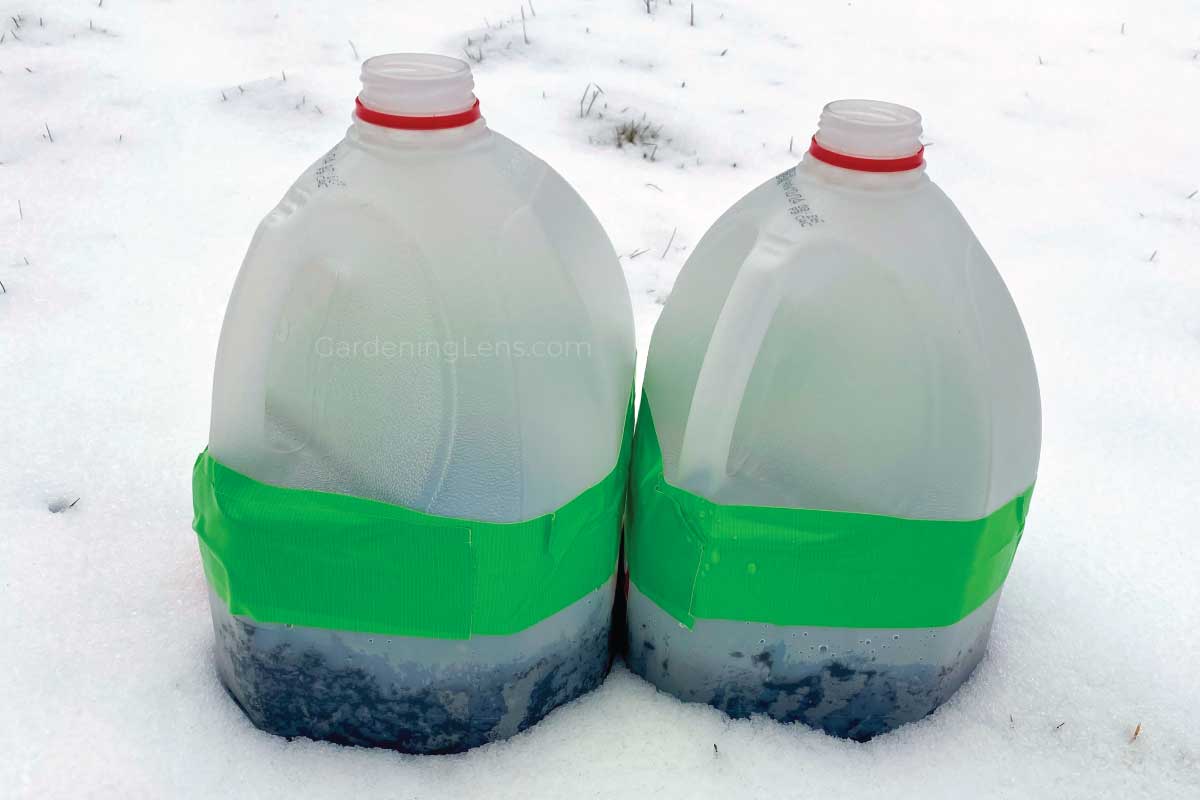
Winter sowing in milk jugs is one of the easiest ways to start seeds. You only need a few supplies and it requires very little maintenance.
In this guide to the winter sowing method, you will learn what is winter sowing, the benefits of winter sowing, when to start winter sowing, and how to start winter sowing.
What is winter sowing?
Winter sowing is a method of seed starting that involves sowing seeds in the cold of the winter either directly in or on the ground or in containers that are left outside.
The types of seeds that gardeners typically choose to winter sow are perennials and hardy annuals. These seeds generally need to be exposed to moist, cold temperatures for a period of time, also known as a stratification period.
Some gardeners artificially provide a stratification period by putting the seeds in the refrigerator. Winter sowing in milk jugs takes advantage of the moist, cold temperatures outside, allowing the seeds to germinate when it’s naturally time to do so.
Benefits of Winter Sowing
Compared with starting seeds indoors, winter sowing in milk jugs requires less equipment and special care.
Here are some of the reasons why winter sowing is a great way to start seeds:
- No space inside is needed. You don’t have to use space inside your house like shelving units, window sills, etc.
- No grow lights are needed. They are exposed to direct sunlight outside.
- No special containers are needed. You can use recycled materials like milk jugs and similar.
- Little maintenance is needed. They can be prepared and let be for the most part until it starts to warm up.
- The seedlings are protected. The milk jugs act as mini DIY greenhouses or cold frames, providing a small amount of protection from the elements.
- The seedlings don’t need to be hardened off as much. They will be tougher because they have been exposed to the elements outside since germination.
A downside of winter sowing in milk jugs might be that they aren’t the most attractive thing to have sitting outside your house. If this concerns you, try to find a spot that is out of sight, but that still gets direct sunlight for a good part of the day.
When to Start Winter Sowing
The best time to start winter sowing is generally between the months of December and March. However, it all depends on your unique climate because you need to ensure that the seeds will receive enough of a stratification period to be successful.
- Use The Old Farmer’s Almanac to look up your average last frost date.
- Use the USDA Plant Hardiness Zone Map to look up your growing zone.
It is only too late to start winter sowing if the seeds won’t receive a long enough stratification period.
How to Start Winter Sowing in Milk Jugs
Now that you know the basics of winter sowing, it’s time to get started. Here are some step-by-step instructions on how to start winter sowing.
1. Gather Supplies
You will need the following supplies for winter sowing in milk jugs:
- Seeds – Perennial and hardy annual plants are best including flowers, vegetables, herbs, and more.
- Soil – Potting soil is best because it retains moisture better than seed starting mix.
- Milk Jugs – Plastic milk or water jugs are commonly used, but other containers will work just as well as long as they are at least semi-transparent (not opaque). Other ideas include soda or juice bottles and other recycled food and beverage containers.
- Scissors – Or something for cutting the containers with.
- Tape – Use duct tape or another type of tape that holds up well to the elements.
- Plant Labels – You can either write directly on the containers or duct tape or you can put plant tags inside the containers. Or both!
- Marker – Use a garden marker or permanent marker like a Sharpie.
2. Prepare Containers
Here is how to prep your containers for winter sowing:
- Toss the lids of the containers because you won’t need them. The containers should have some airflow and allow a bit of moisture in from precipitation.
- Poke drainage holes in the bottom of the containers. How many holes depend on the size of the containers, but for a milk jug, four or five holes will do.
- Cut the container in half horizontally, leaving an inch attached (under the handle if using milk jugs).
- Fill the bottom half of the containers with a few inches of moistened soil, enough room for roots to develop.
- Sow the seeds in the soil. How many seeds per jug? You can sow fewer seeds giving them plenty of space to grow or you can scatter them freely and plan to thin them out later. Be sure to plant the seeds at the depths indicated on the seed packets.
- Place a label inside the container if you want.
- Tape the container closed where you cut it earlier.
- Use a marker to label again on the containers or tape if you want.
3. Place Containers Outside
The containers should be placed outside in an area that will allow them to receive sunlight for a good amount of the day. If they are in the shade, they may not be as successful.
Additionally, you will want to think about your climate and weather conditions and adjust where you place them accordingly. For example, if your area is often very windy, you might want to place them in a semi-protected area so they don’t dry out as quickly or get blown around.
4. Maintain Containers
Winter sowing in milk jugs requires little maintenance, but that doesn’t mean you can forget about them completely.
You should check on the containers periodically to see if they are too wet or too dry.
- If they are too wet, consider adding more drainage holes.
- If they are too dry (in which case, they will feel very lightweight), gently mist some water through the hole in the top to add moisture while not dislodging anything.
After the seeds have germinated especially, you should keep a closer eye on them.
Temperature fluctuations can cause seeds to sprout during warm spells and seedlings to freeze during subsequent cold spells. This won’t always be the case because the containers offer some protection.
However, if you are expecting especially cold temperatures, consider covering the jugs with a frost cloth or even bringing them into an interior space like a shed or garage overnight.
5. Transplant Seedlings
As the weather gets warmer, your seedlings will continue to grow and start to fill the containers. If it’s warm enough during the day, you can consider opening the milk jugs and then closing them again at night.
Your seedlings are ready to be transplanted into your garden when the seed packets indicate is the best time.
Conclusion
We hope you learned something from this beginner’s guide to winter sowing in milk jugs.
Winter sowing works really well and is a great option if you want something that requires fewer supplies and less maintenance.


