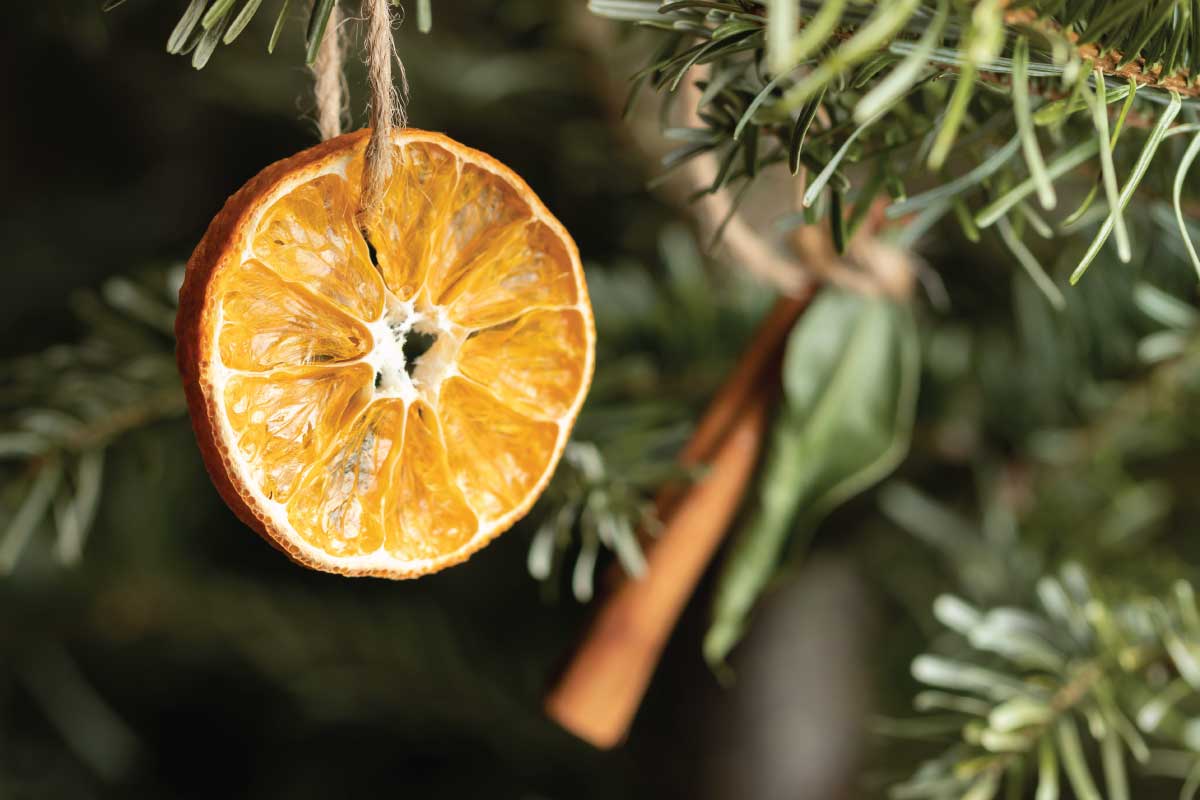
The tradition of decorating homes during the holiday season is a long-standing one, with practices varying from culture to culture. Among these, the use of dried fruit, particularly orange slices, as ornaments is a custom that infuses homes with a delightful fragrance and a touch of rustic charm. This article will guide you through the process of creating your own dried orange slice ornaments, a delightful project that can be both meditative and festive.
The Appeal of Orange Slice Ornaments
Dried orange slice ornaments bring a natural element to holiday decor, standing out against the synthetic tinsel and baubles that are often seen during the season. The oranges, when dried, emanate a subtle, sweet aroma and their translucent quality captures the glow of twinkling lights beautifully. Additionally, making these ornaments can be a sustainable practice, as it uses natural materials that are biodegradable and can serve multiple purposes even after the holidays.
Selecting Your Oranges
The first step in creating dried orange slice ornaments is selecting the right oranges. You’ll want to choose oranges that are firm and free of blemishes. Navel oranges are an excellent choice due to their thick skin and vibrant color. The size of the orange will also determine the size of the ornament, so consider this when making your selection.
Preparing Your Ornaments
Ingredients and Materials Needed:
- Oranges (number depending on how many slices you want)
- Sharp knife or mandoline slicer
- Paper towels
- Baking sheets
- Parchment paper or a silicone baking mat
- Oven
- Cooling rack
- Ornament hooks or twine
- Optional: Cloves, cinnamon sticks, or star anise for additional scent and decoration
Instructions:
- Preheat and Prep: Begin by preheating your oven to a low temperature, between 170-200 degrees Fahrenheit (75-95 degrees Celsius). This low heat will dry out the orange slices without burning them.
- Slice the Oranges: Cut the oranges into slices about 1/4 inch thick. Consistency is key, as uneven slices will dry at different rates. A mandoline slicer can ensure uniform thickness.
- Blot the Slices: Use paper towels to blot away as much moisture as possible from both sides of the orange slices. Removing excess juice will help them dry faster and prevent burning.
- Arrange for Drying: Place parchment paper or a silicone mat on baking sheets, and arrange the orange slices in a single layer so that they are not touching. This will allow air to circulate around each slice for even drying.
- Dry in the Oven: Place the baking sheets in the preheated oven. The drying process will take approximately 4-6 hours, but this can vary based on the thickness of the slices and individual oven temperatures. Flip the slices every hour to ensure even drying.
- Check for Doneness: You’ll know the orange slices are done when they are completely dry and slightly hardened. They should still retain some of their orange color; if they turn brown, the oven may be too hot or they’ve been left in too long.
- Cool the Slices: Once dried, place the orange slices on a cooling rack and allow them to cool completely. They should be at room temperature before you proceed to the next step.
Making Them Into Ornaments
- Create a Hanging Mechanism: Use a small skewer or nail to create a hole near the top of each orange slice. Be gentle to avoid breaking the slice.
- Thread the Twine: Cut pieces of twine or ribbon about 6-8 inches long. Thread the twine through the hole and tie a knot to create a loop for hanging.
- Add Decorative Elements: If desired, embellish your orange slice ornaments with additional spices such as cloves (which can be pressed into the flesh of the orange slice), or tie a small cinnamon stick or star anise to the twine for extra aroma and visual interest.
Displaying Your Ornaments
Dried orange slice ornaments can be displayed in numerous ways:
- On the Tree: Hang them on your Christmas tree alongside other ornaments.
- In Garlands: String them along with pinecones and greenery to make a festive garland.
- As Window Decor: Hang them in windows where they can catch the light.
- In Gift Wrapping: Use them as a natural and unique addition to gift wrapping.
Preservation and Storage
After the holiday season, dried orange slice ornaments can be stored for use in the following year. Wrap them in tissue paper and place them in an airtight container, storing them in a cool, dry place to prevent mold and preserve their scent.
Conclusion
Making dried orange slice ornaments is a simple, enjoyable way to create beautiful, natural decorations for the holidays. Not only does this craft embrace the spirit of sustainable living, but it also offers an opportunity to create lasting holiday memories with friends and family. Each ornament, with its unique patterns and warm tones, adds a touch of artisanal beauty to your festive decor. So this season, why not slow down and savor the simple joy of making something by hand with this timeless holiday craft.